

How To Edit A Background In Photoshop
Do you want to change the background of a photo in Photoshop? Maybe you want to turn a cloudy sky into a cute sunny day? Or add a flat groundwork to your corporate headshot? If so, yous'll be pleased to know it'due south actually quite piece of cake.
Being able to alter the background of a picture is one of Adobe Photoshop's best features. The application even includes tools to select tricky areas like hair, and match the colors from different images.
How to Modify the Background of a Photo in Photoshop
The best approach to making a background alter in Photoshop is to create a pick that separates the foreground and the background.
As with everything in Photoshop, in that location are several different means to exercise achieve the same results. In this tutorial, we'll be using the Quick Choice tool, but information technology would work just as effectively with the Pen tool.
Here'south what we're going to create. We'll beginning with the photo on the left, and cease with the one on the correct.
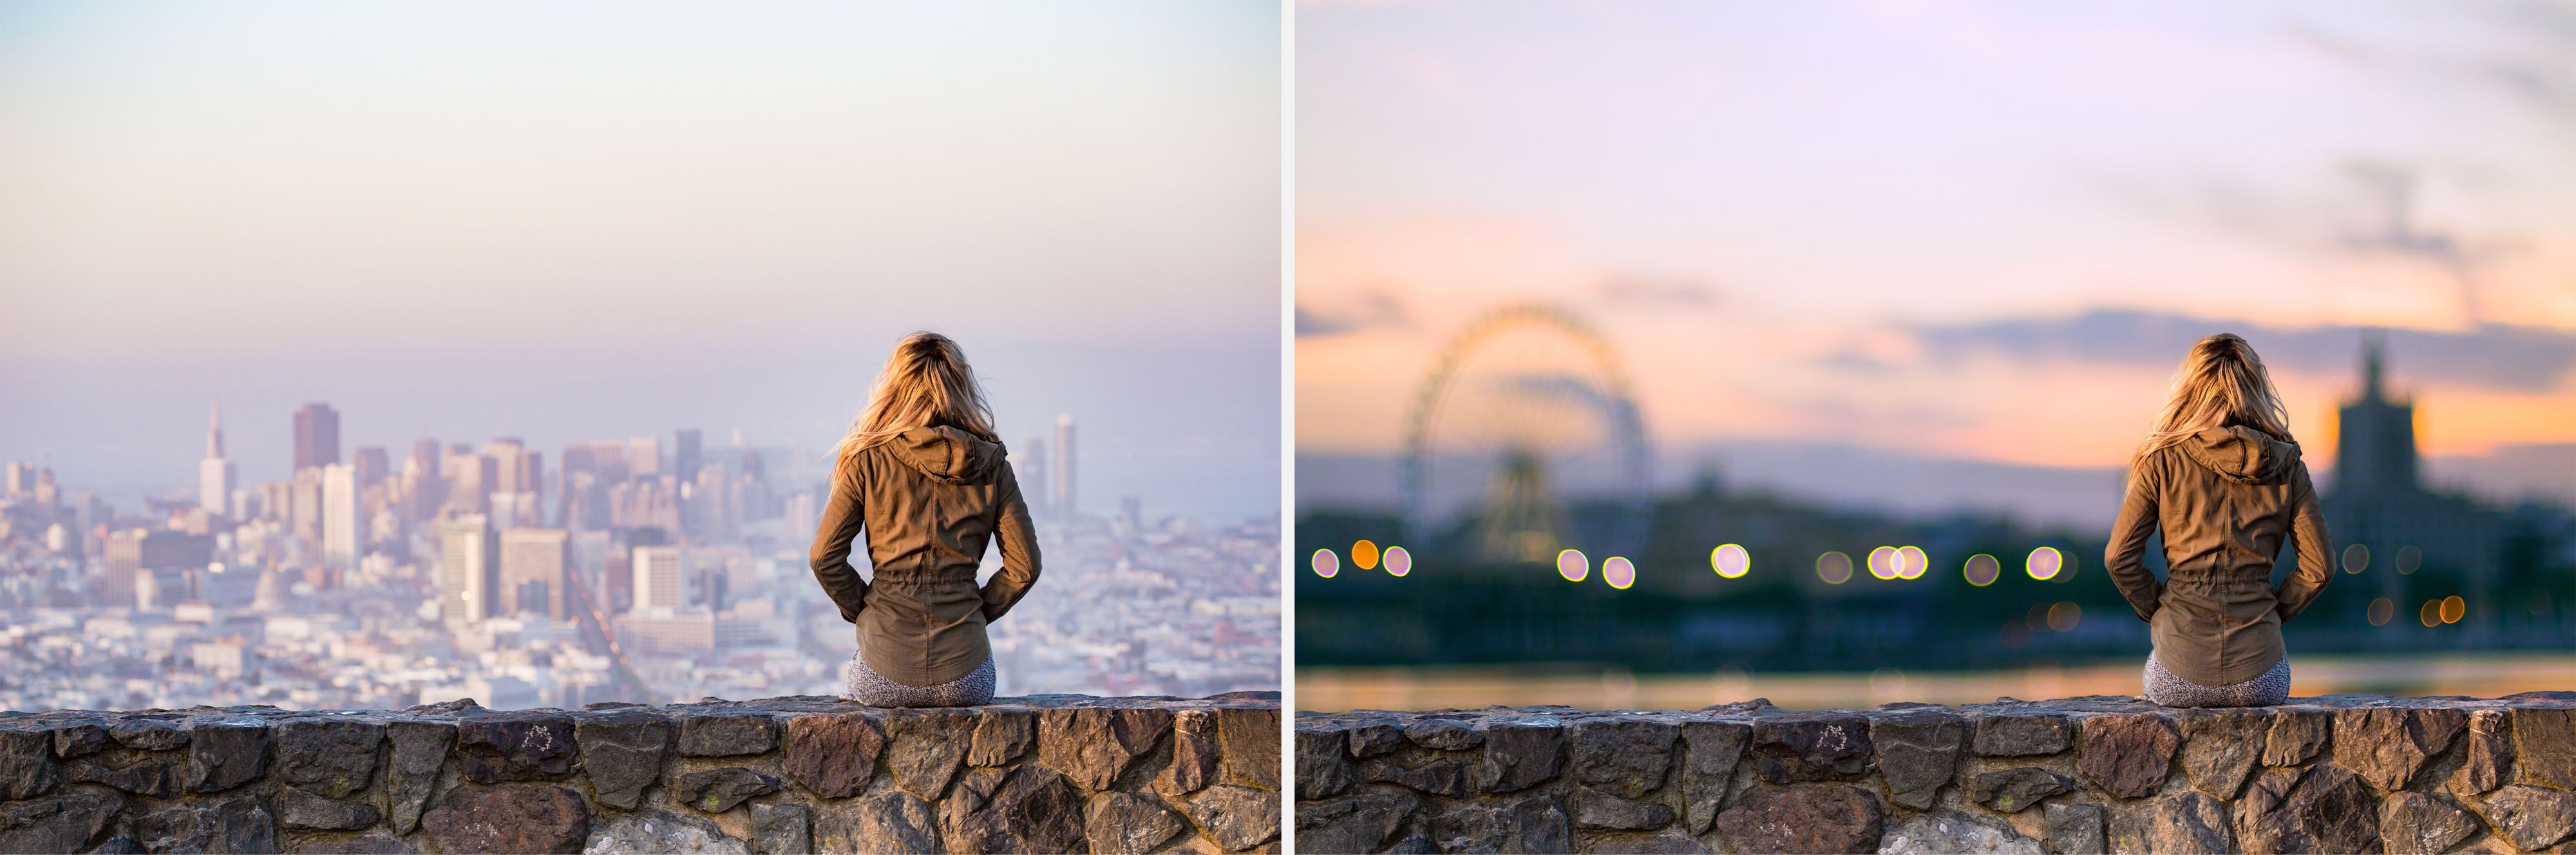
We're using images from Pexels.com, one of the best royalty-costless image sites. Information technology's a dandy place to find content to practice with. You can download our main image here.
Step ane: Select the Foreground Object
Take hold of the Quick Choice Tool from the toolbar, or hit W on your keyboard (one of many useful keyboard shortcuts in Photoshop). With a hardish brush, click and drag inside the surface area you want to select. Photoshop volition try to guess which parts you want to include based on the contrast levels in the image.
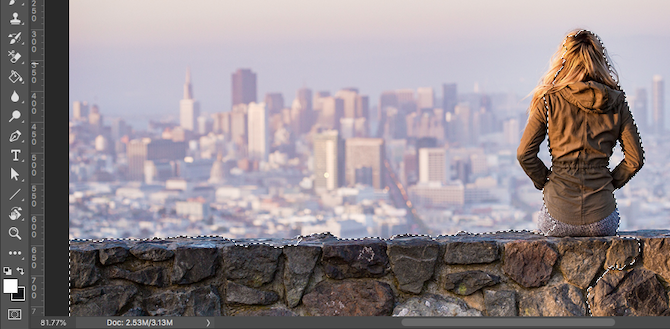
Every bit a result, you'll observe that areas with loftier contrast and hard edges are selected cleanly, only low contrast and soft edges will crave more than work.
In some images, you might discover it easier to select the background instead. Yous can then capsize the selection past pressing Shift + Ctrl + I on Windows, or Shift + Cmd + I on Mac.
Step two: Fine-Tune Your Selection
To fine-tune your pick, zoom into the image and make your castor size smaller by pressing the left foursquare bracket. Now, go on clicking and dragging to add parts of the foreground object to your selection.
If yous need to remove anything from the selection, hold down the Alt central and click and elevate in those areas.
Ideally, your option should comprise all solid objects, simply you don't need to obsess over selecting individual strands of hair, for example. Nosotros'll sort that out in a moment.
Step 3: Select and Mask
In the options bar at the top of the screen, click Select and Mask. The screen that opens enables you to refine the selection and convert it into a mask.
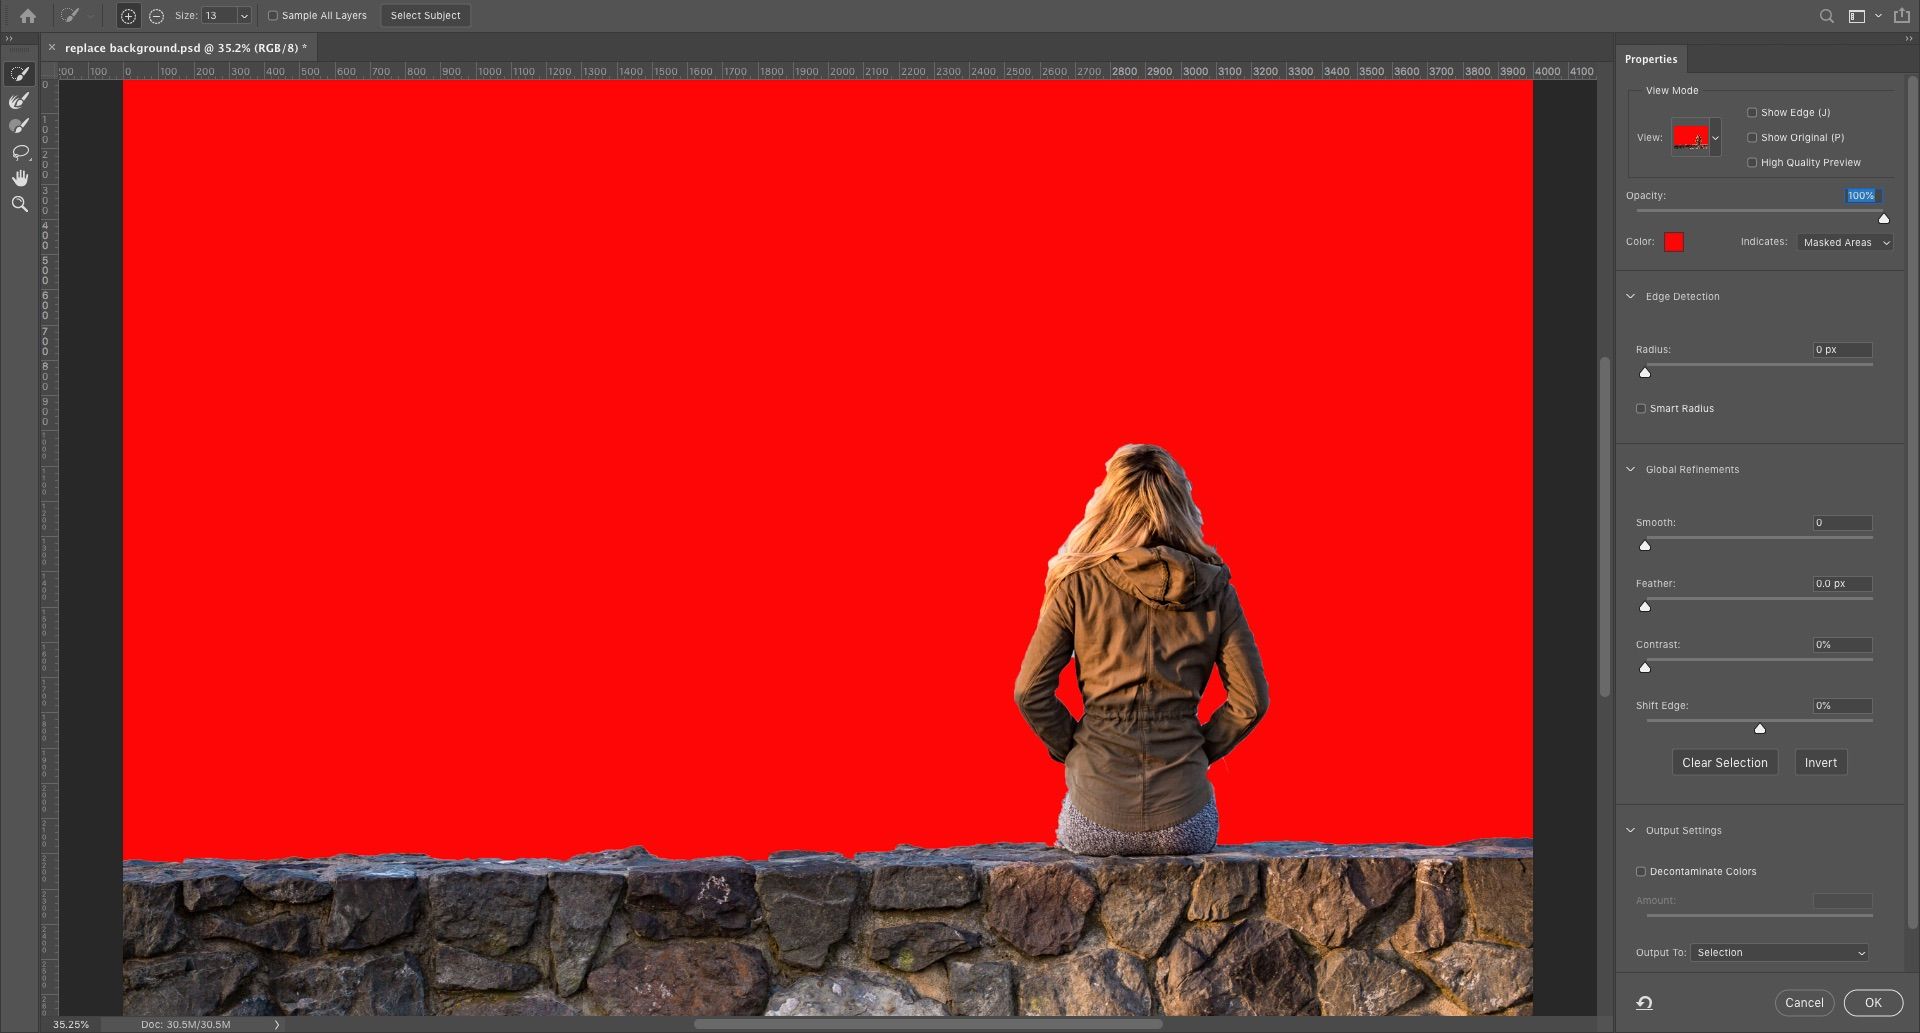
In the Properties panel, click the View Mode pick to change how you volition run across your selection. Overlay is a skillful choice, as you can pick a colour that contrasts with your image. But as you work, y'all may want to hit the F primal to wheel through the views—different backgrounds volition highlight any problems with your selection.
Stride 4: Refine the Selection
At present you lot can brainstorm refining the selection. In the toolbar on the left side of the screen are various tools to help y'all with this:
- Quick Selection Tool. The same as we used in step one, this tin can exist used to quickly add (or remove) whatever larger areas to your selection.
- Refine Edge Brush Tool. All-time used over hair and other soft edges.
- Brush Tool. Use this over harder edges.
- Lasso/Polygonal Lasso Tool. Manually draw areas to add or remove from your selection.
Zoom in to your epitome to check the edges of the selection. Yous won't demand to bear upon much of it—you're mostly looking for areas that either oasis't been selected, have been wrongly selected, or have very crude edges.
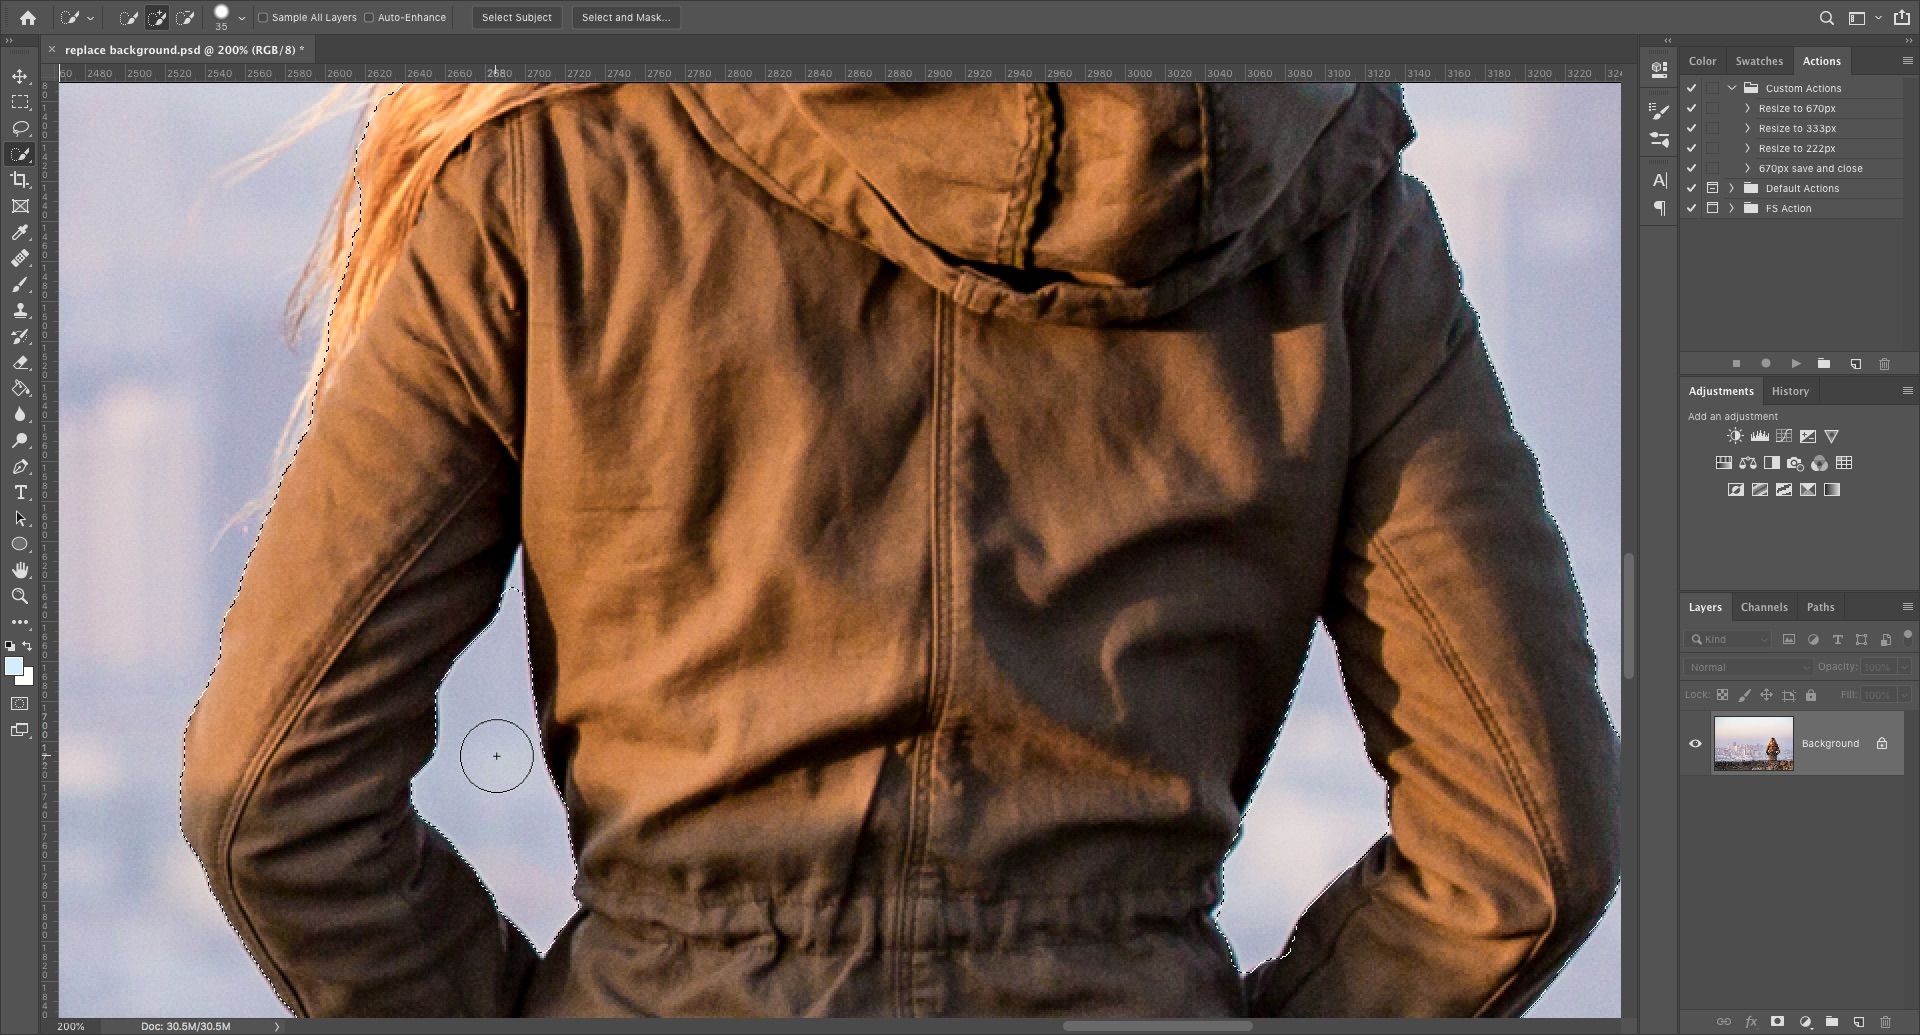
In our epitome, we'll start with the Brush tool to smoothen the edges of the wall and trunk. Just paint in to add together to the selection, or hold Alt and paint to remove areas.
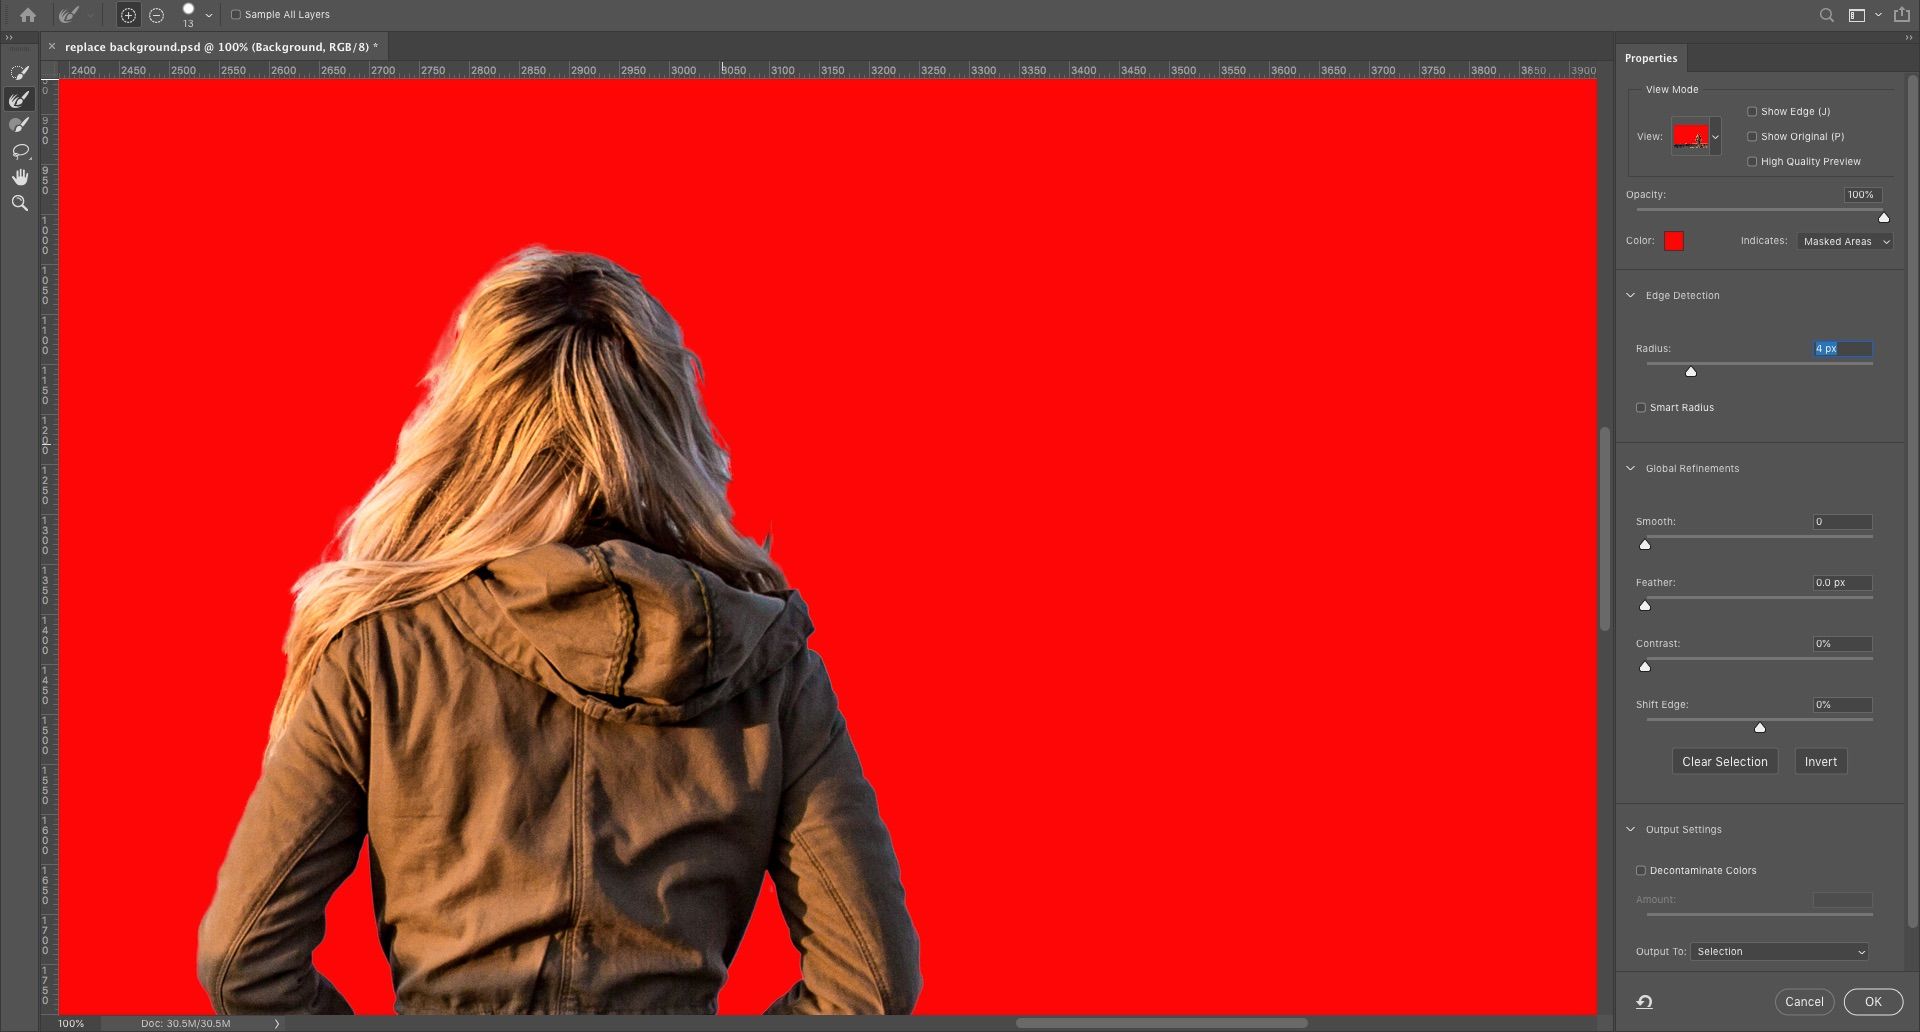
Next, switch to the Refine Edge tool to impact upwardly the hair, or whatever soft edges. Under Border Detection in the right-hand panel, check the box marked Smart Radius. This helps Photoshop make a stardom between soft and hard edges.
Also, y'all can increase the Radius a little. Y'all'll demand to practice this by eye to see its effects—press P to toggle between before and after.
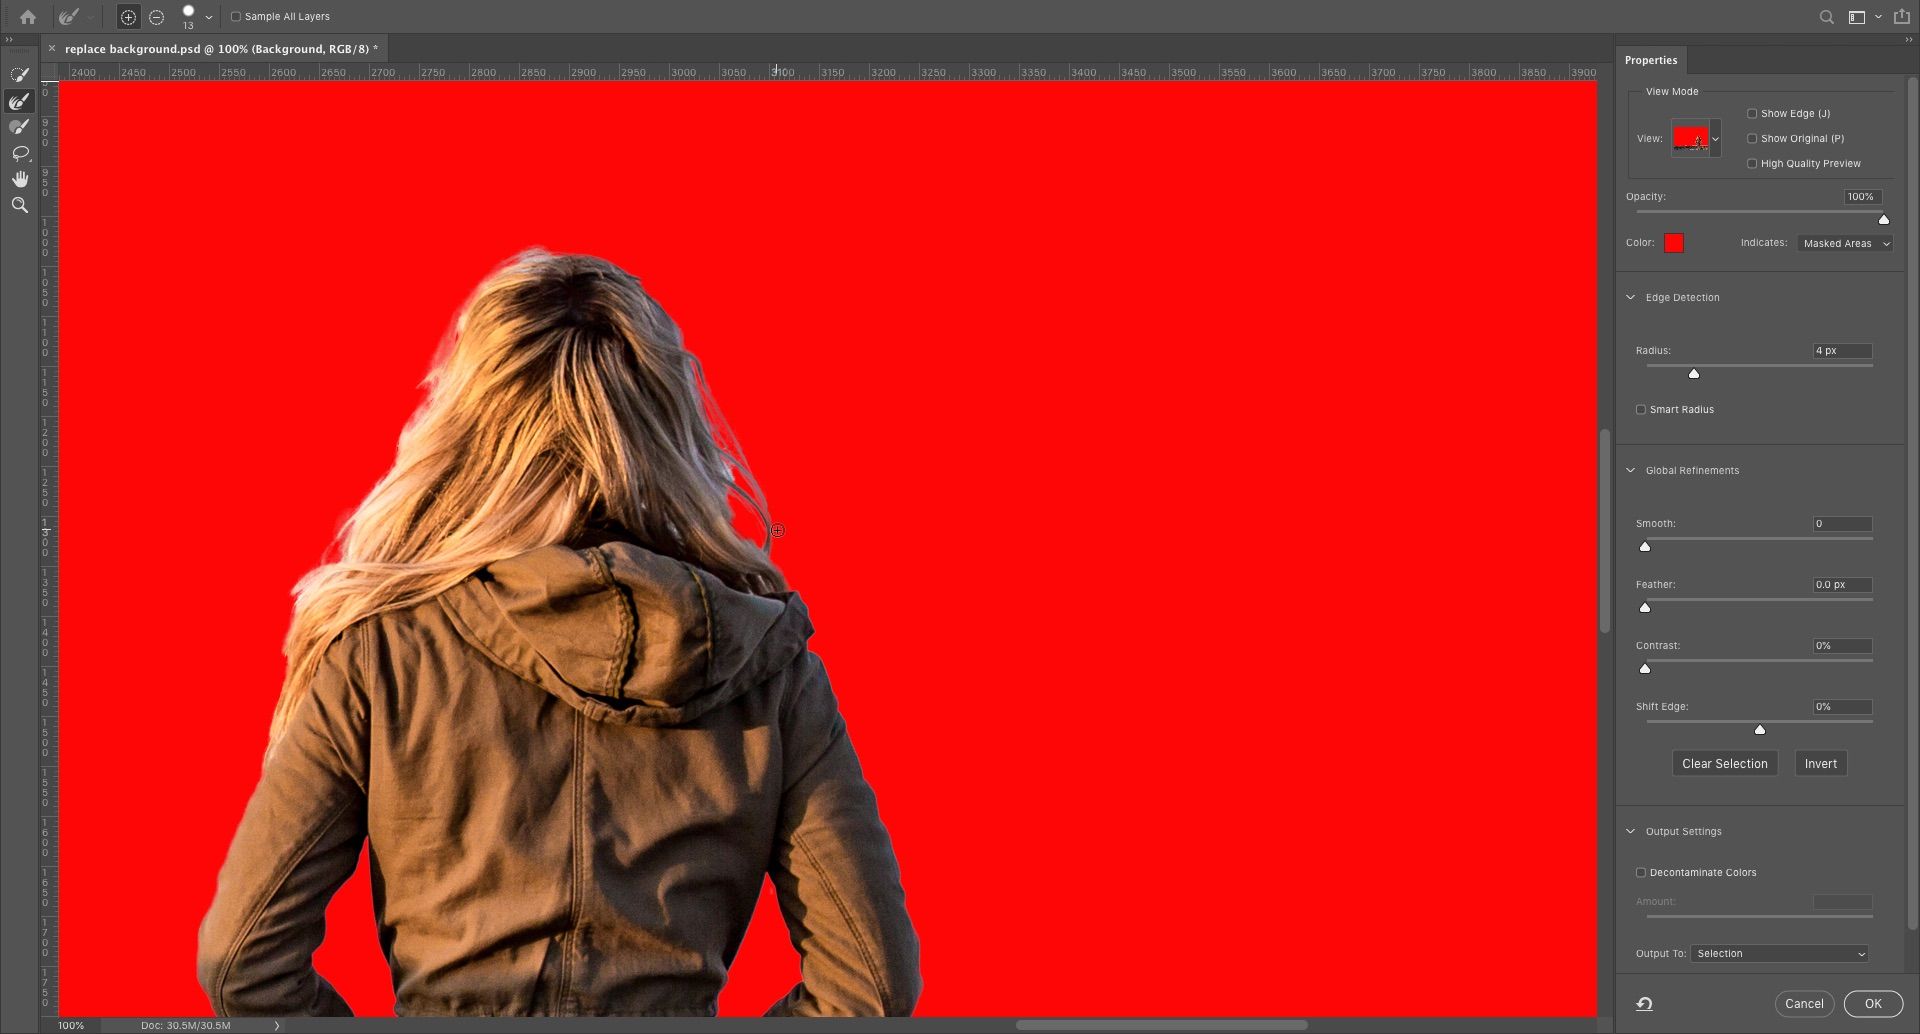
Place a softish Refine Edge castor on the outer edge of the hair and begin brushing. You should see strands of hair starting to be added to the selection. Hold down the Alt key and paint to undo your changes if you aren't happy with them.
Step 5: Adjust the Settings
The Select and Mask options include several listed under Global Refinements. Nosotros don't need to apply them for our prototype, just for reference they are:
- Smooth. Smooths the border of a choice, removing any jagged lines. Proficient for selections with a clear edge.
- Feather. Softens the border of a option by adding a feather.
- Dissimilarity. Hardens the edge of a selection by increasing contrast on the edge pixels.
- Shift Edge. Moves your entire selection in or out by a specified number of pixels.
Step 6: Remove Color Fringing
Once you're happy with your pick, go to the Output Settings in the right-mitt panel. Tick Decontaminate Colors to remove any color fringe left in your pick.
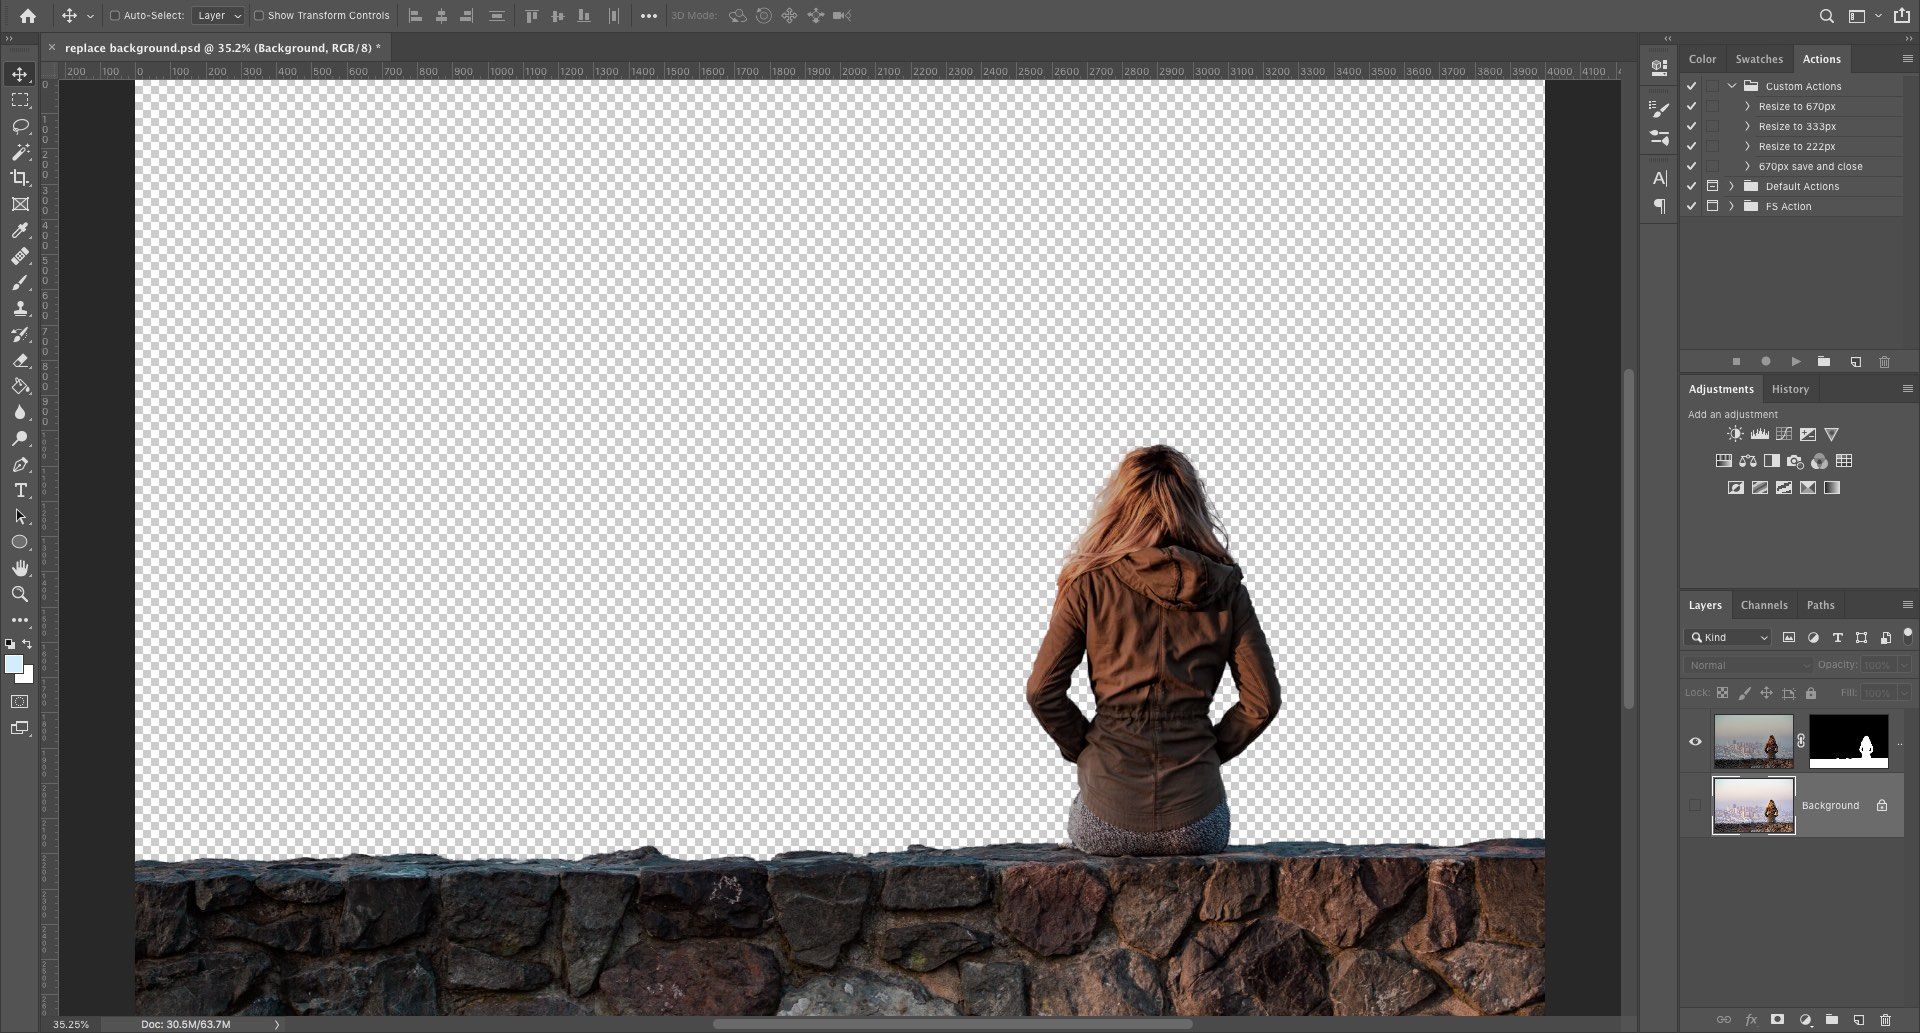
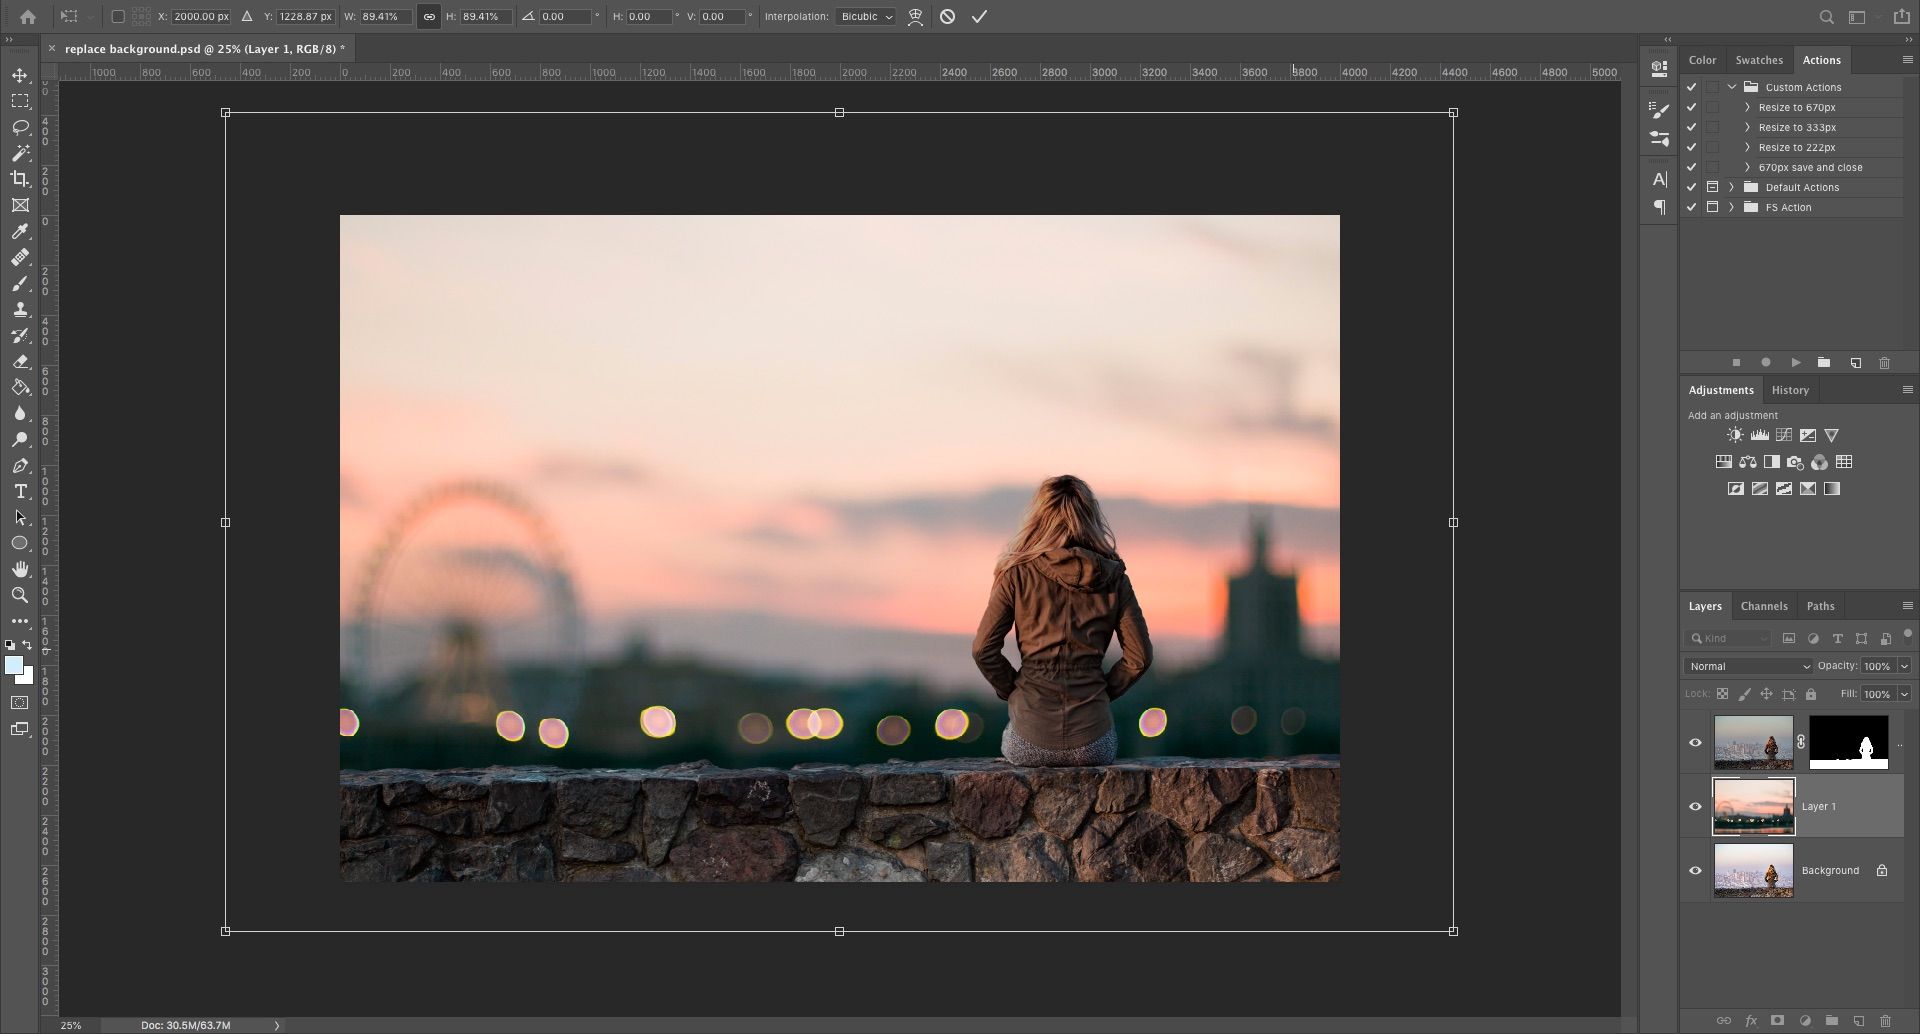
In Output, cull New Layer with Layer Mask, and click OK. You will now return to your chief image, with your option added as a new layer. Now that yous've removed the image background, y'all're prepare to add together a new background.
Footstep 7: Paste Your New Background
Adjacent, paste in the image containing your new background. Identify it on a layer merely below the layer containing your foreground selection.
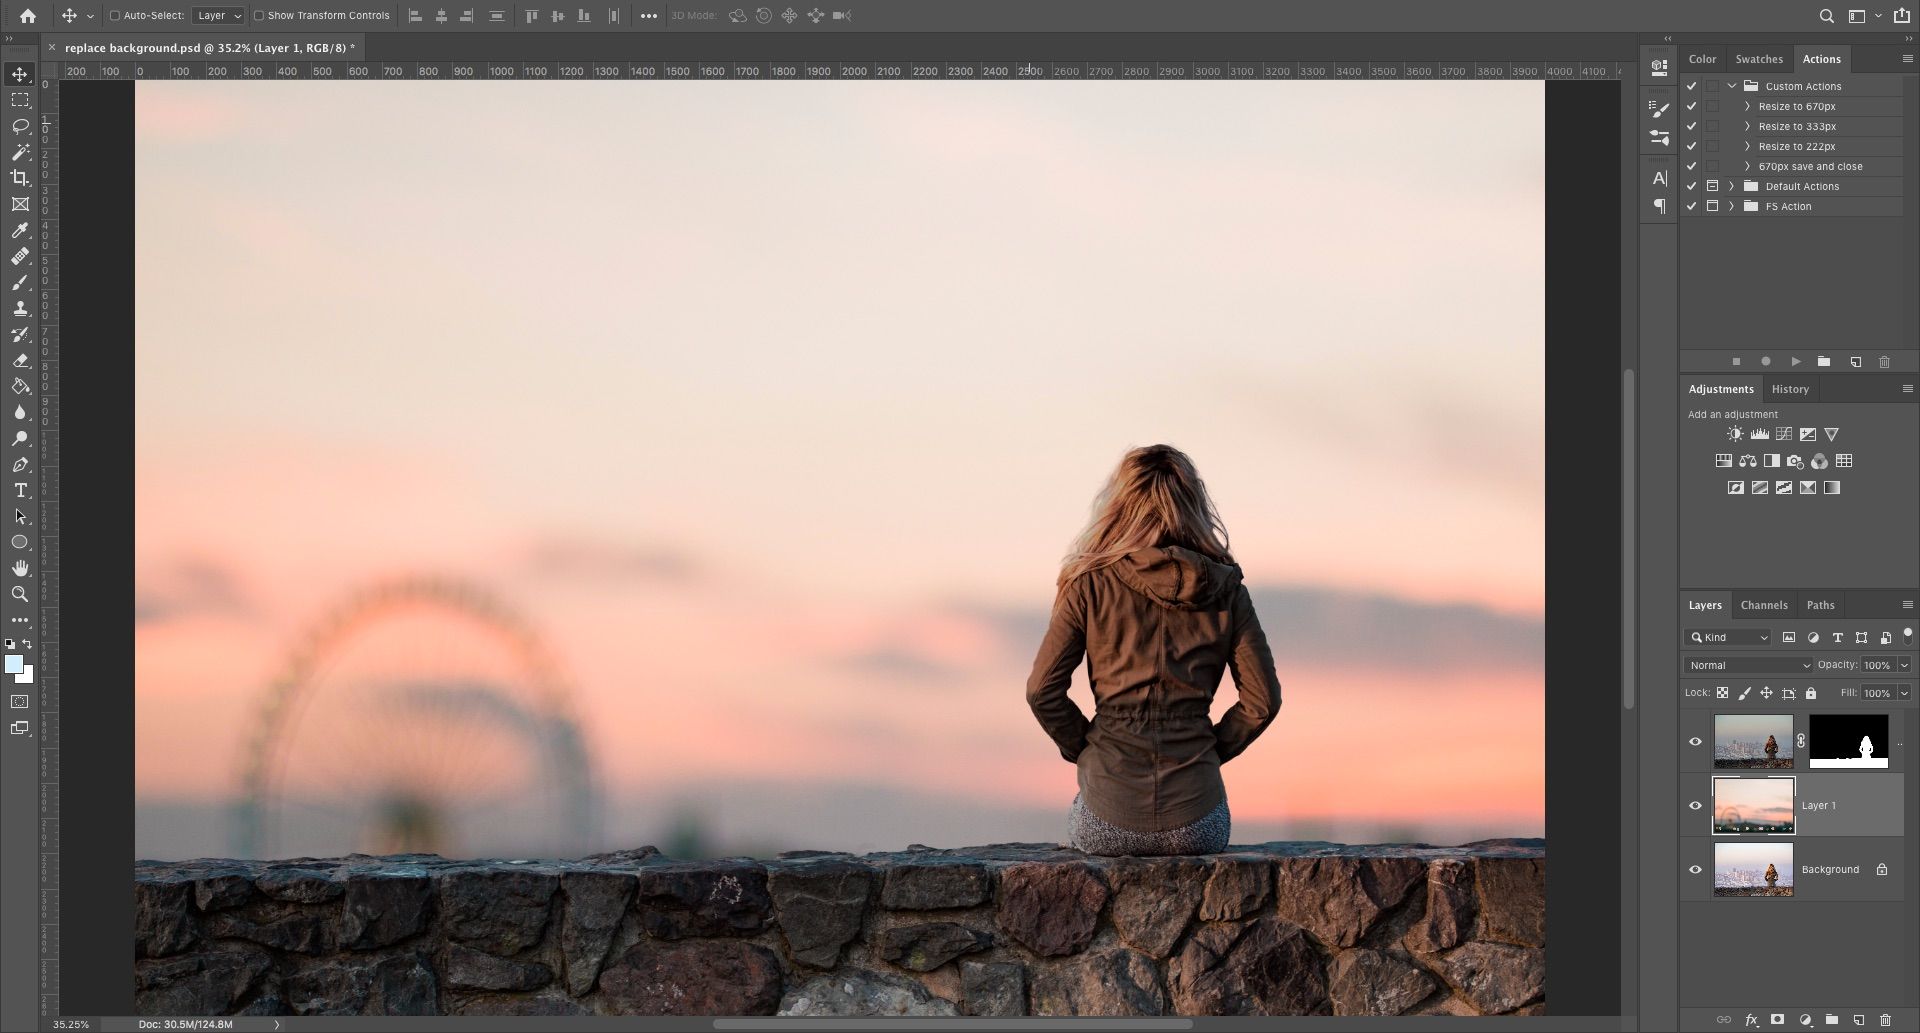
Use the Hand tool to position the layer wherever you desire, resizing it if necessary using the Gratuitous Transform tool (Ctrl +T or Cmd + T). Grab the handles on the corners or sides of the images and drag inwards to brand it smaller. Concord the Shift key to keep the aspect ratio the aforementioned.
Stride 8: Match the Colors
By now information technology should exist looking pretty skillful. The final pace is to gear up the colors of the foreground to make sure they blend properly with the background.
Select the foreground layer, making sure to select the image, not the mask. Go to Image > Adjustments > Match Color.
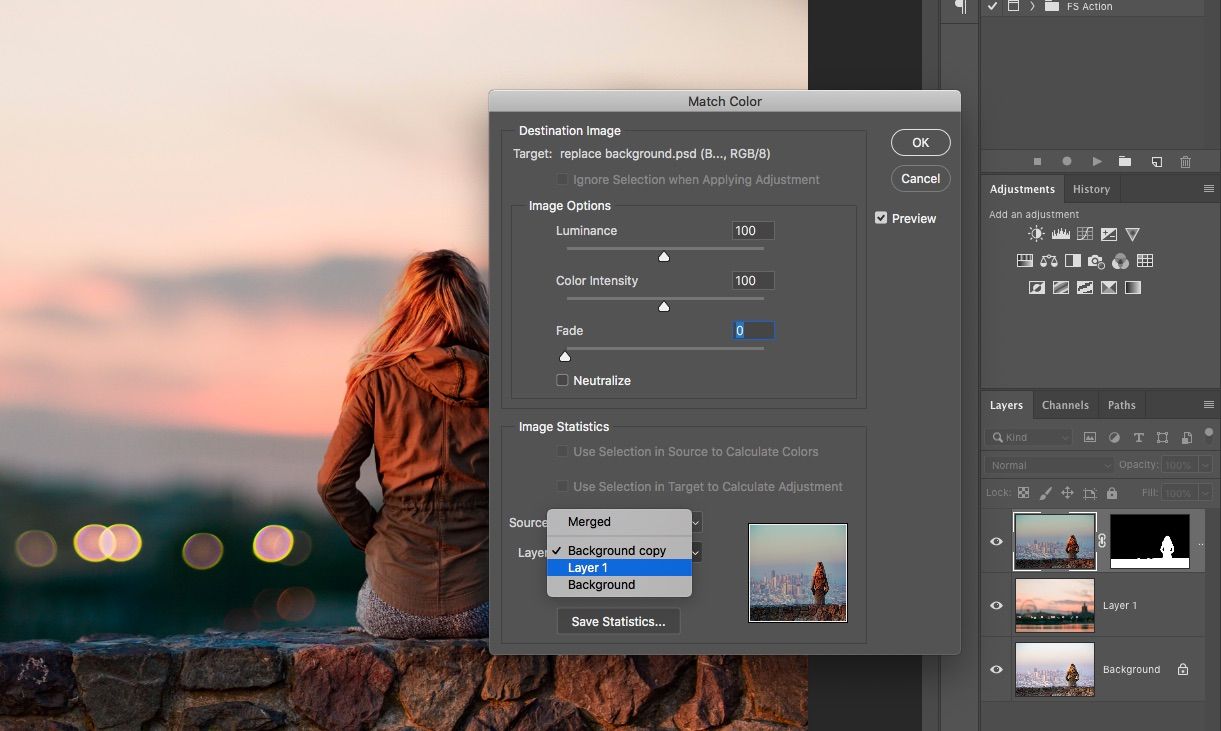
In the window that opens, go to Source and select the image you're working on. Under Layer select which layer you want to gear up—y'all tin can either match the foreground to your new background, or vice versa.
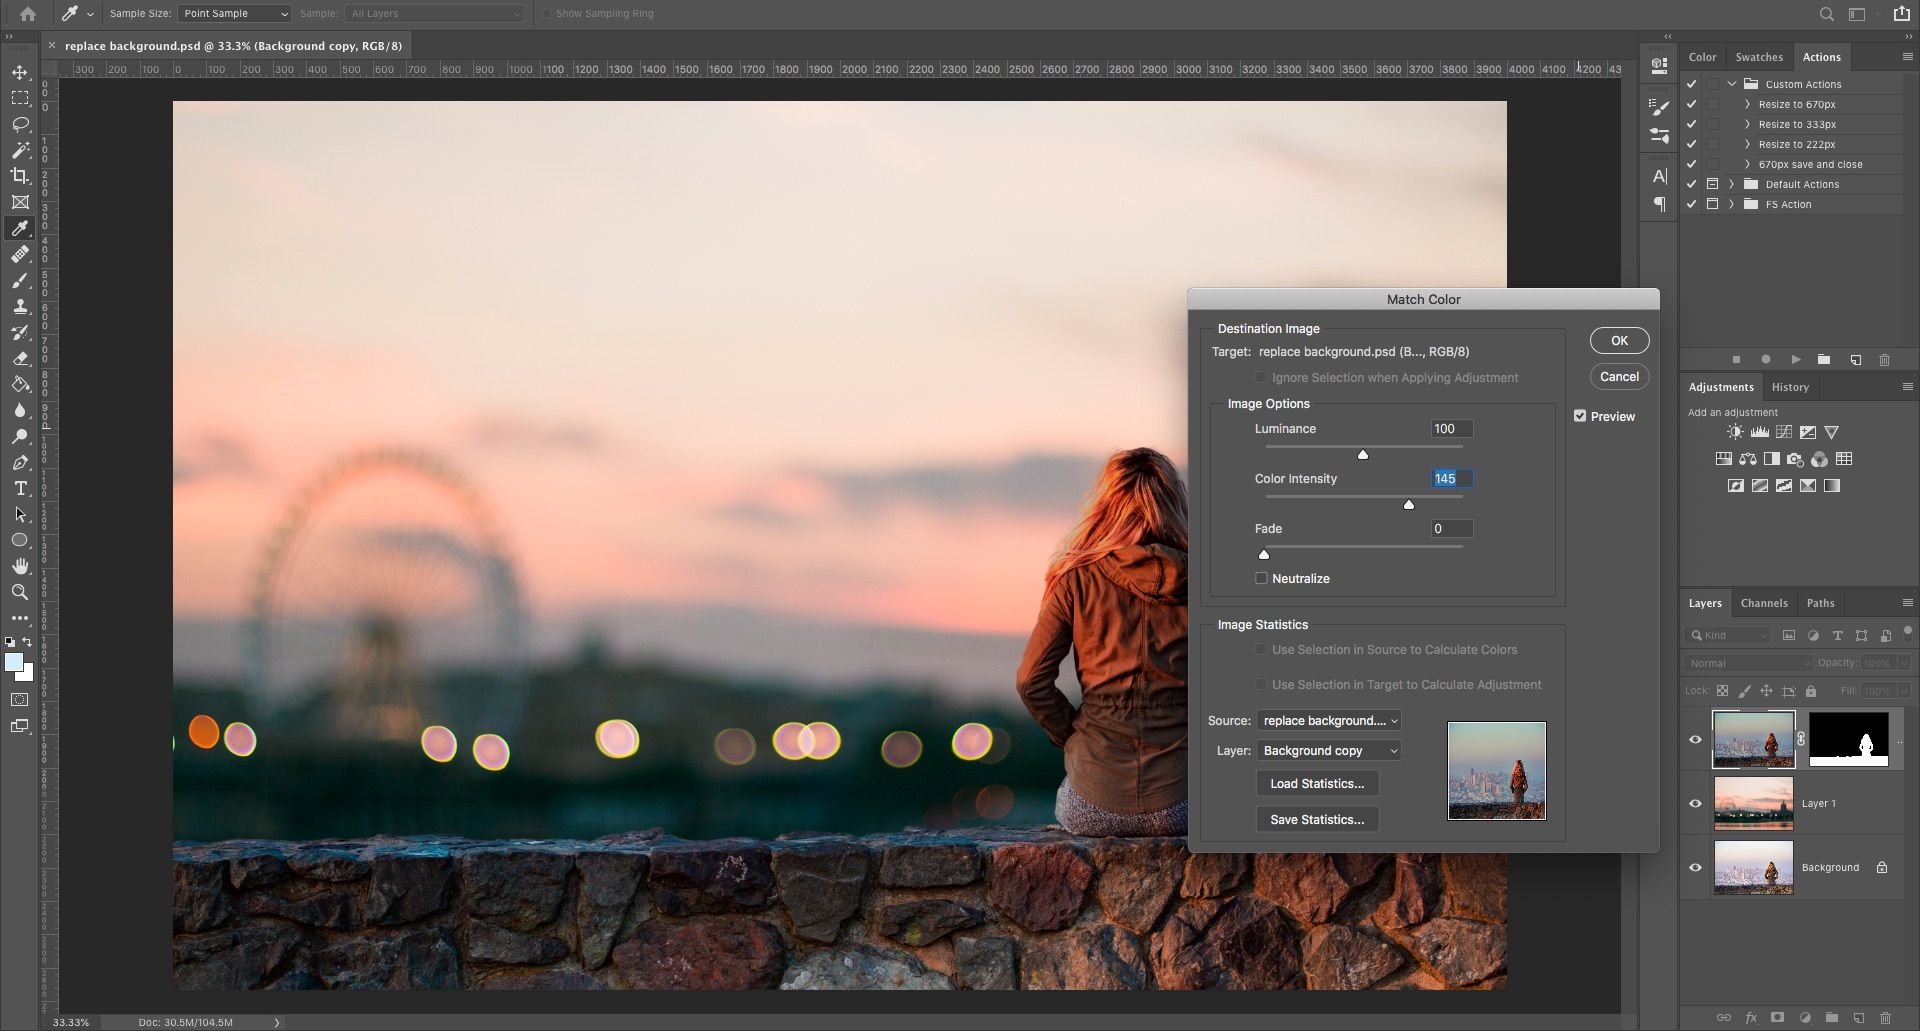
At present bank check the Neutralize box to remove any color casts from your chosen layer, and accommodate the Luminance and Intensity options until your foreground and background match. You can reduce the issue using the Fade slider if you need to. Employ the Preview option to toggle betwixt the earlier and after states.
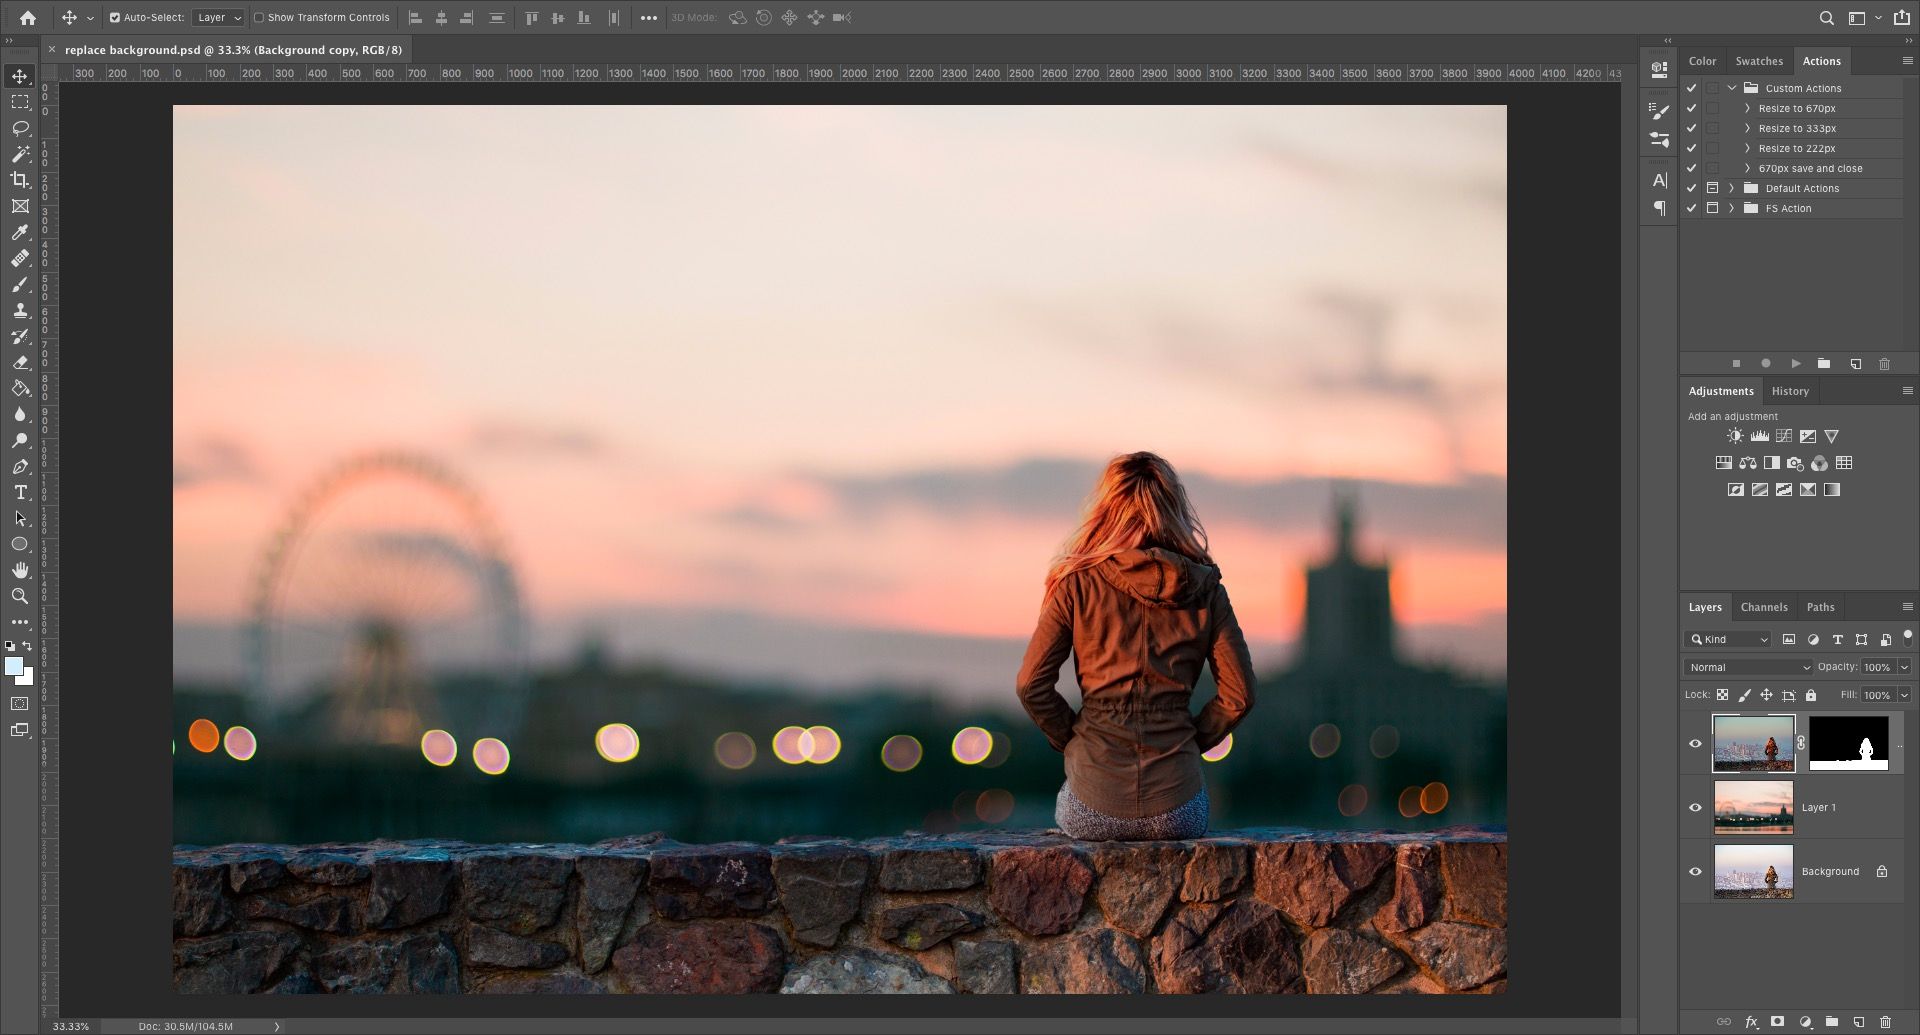
Pace 9: You're Washed!
Click OK and you're done. Salve your file in the PSD format to preserve all the layer information. With the foreground, groundwork, and original image all on divide layers, your file remains fully editable. For more than ways to improve your image editing, endeavour these Adobe Photoshop workflow tips.
You can edit the mask to add together or remove from what'southward visible in your foreground, and you can reposition the groundwork or even experiment with different ones entirely.
To share your prototype you lot'll need to save it in another format. Become to File > Salvage As and cull JPEG to do this. Don't delete your PSD, though—that's your backup!
What If Y'all Don't Accept Photoshop?
When you desire to change an paradigm background in Photoshop, it's easy. Yous can fifty-fifty apace add together someone to your images or remove blemishes from photos. Only yous tin achieve similar things in well-nigh other serious graphics packages, too.
There are lots of complimentary alternatives to Photoshop if you don't want to pay for it. We recommend GIMP equally a good starting point, equally it's available for Windows, Mac, and Linux. But that's only one of your options.
Most The Author


How To Edit A Background In Photoshop,
Source: https://www.makeuseof.com/tag/how-to-change-the-background-of-a-photo-in-photoshop/
Posted by: marchfaryinly.blogspot.com
0 Response to "How To Edit A Background In Photoshop"
Post a Comment